September 2024

Hair Loss

Top Myths and Facts About PRP Hair Loss Treatment

Platelet-rich plasma (PRP) therapy has gained significant attention as a revolutionary treatment for hair loss. With its natural healing properties, PRP is becoming a popular choice for individuals seeking a minimally invasive solution to thinning hair. However, like many new treatments, PRP therapy comes with its share of myths and misconceptions. Let’s debunk these myths and explore the facts about PRP hair loss treatment. Myth 1: PRP Treatment Is Painful Fact: PRP therapy involves drawing your own blood, processing it to concentrate the platelets, and injecting the platelet-rich plasma into your scalp. While the idea of multiple injections might sound painful, most patients report only mild discomfort. A numbing cream is often applied to the scalp before the procedure, making it relatively pain-free. Any discomfort experienced during or after the treatment is generally minimal and temporary. Myth 2: PRP Therapy Provides Instant Results Fact: PRP treatment is not an overnight solution for hair loss. While it stimulates hair growth by promoting healing and cell regeneration, the results take time to appear. Most patients begin to notice improvements after 3-4 months, with full results visible after 6-12 months. It’s important to be patient and continue with follow-up treatments as recommended by your doctor for optimal results. Myth 3: PRP Therapy Works for Everyone Fact: While PRP therapy can be highly effective for many individuals experiencing hair thinning or early hair loss, it may not be suitable for everyone. The treatment is most successful for individuals with mild to moderate hair loss and those with good overall health. It may not be as effective for people with advanced baldness or certain underlying medical conditions that affect hair growth. A consultation with a hair specialist can help determine if PRP is the right option for you. Myth 4: PRP Treatment Is Unsafe Fact: PRP therapy is considered a safe procedure since it uses your own blood, reducing the risk of allergic reactions or infections. The platelet-rich plasma is injected into your scalp, helping to promote hair growth in a natural way. Additionally, PRP has been used for decades in various medical fields, including orthopedics and dermatology, to heal injuries and promote tissue regeneration, further supporting its safety profile. Myth 5: PRP Therapy Only Works for Men Fact: PRP therapy is effective for both men and women experiencing hair loss. Hair thinning and hair loss affect individuals of all genders, and PRP offers a viable treatment option for anyone seeking to improve hair density. Both men with androgenetic alopecia (male-pattern baldness) and women with hair thinning due to hormonal changes, stress, or other factors can benefit from PRP treatments. Myth 6: PRP Results Are Permanent Fact: PRP therapy helps stimulate hair growth, but it is not a permanent cure for hair loss. Hair loss is often a progressive condition, and while PRP can significantly slow it down and improve hair thickness, ongoing maintenance treatments may be required to sustain the results. Depending on the severity of hair loss, follow-up treatments every 4-6 months are generally recommended to maintain the benefits. Myth 7: PRP Therapy Requires a Long Recovery Time Fact: One of the biggest advantages of PRP therapy is that it has minimal downtime. After the procedure, most patients can resume their normal activities immediately. Some may experience mild swelling, redness, or tenderness at the injection sites, but these side effects usually subside within a day or two. It’s a convenient option for those with busy lifestyles. Myth 8: PRP Therapy Is a Standalone Solution for Hair Loss Fact: PRP therapy can be highly effective, but it is often used in combination with other hair loss treatments for optimal results. Many patients use PRP alongside medications like minoxidil (Rogaine) or finasteride (Propecia), or even after hair transplant surgery, to enhance the effectiveness of these treatments. Combining therapies can help address hair loss from multiple angles. Myth 9: PRP Treatment Requires a Single Session Fact: PRP therapy is not a one-time treatment. Hair growth takes time, and multiple sessions are required to achieve noticeable results. Typically, patients undergo an initial series of 3-4 treatments spaced about 4-6 weeks apart. After the initial phase, maintenance sessions every few months may be recommended to sustain the hair growth benefits. Myth 10: PRP Treatment Is Only for New Hair Growth Fact: While PRP therapy is often associated with stimulating new hair growth, it also helps improve the overall health of your existing hair. By nourishing the hair follicles with growth factors, PRP can strengthen hair strands, increase hair thickness, and reduce hair shedding. This makes it an effective treatment for improving both hair quality and density. Conclusion PRP therapy for hair loss is an exciting and promising option for individuals looking to restore their hair naturally. While there are many myths surrounding the treatment, the facts show that PRP is a safe, effective, and minimally invasive solution for hair thinning and early hair loss. As with any medical treatment, it’s essential to consult with a qualified specialist to determine if PRP is the right approach for you. At La Fameux Derma Clinic, we offer expert consultations and personalized PRP treatment plans to help you achieve healthy, fuller hair.

skin

How to Remove Black Spots on Back and Neck: Effective Treatments & Home Remedies

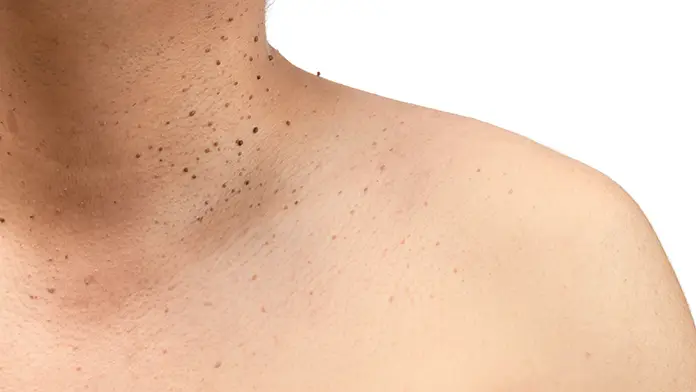
Black spots or hyperpigmentation on the back and neck can be a common concern for many people. These dark patches can be caused by several factors, including sun exposure, acne scars, friction from clothing, or skin conditions like melasma. Fortunately, there are several treatments and home remedies that can help reduce and eventually remove black spots on the back and neck. Here’s a comprehensive guide to addressing this issue. 1. Causes of Black Spots on the Back and Neck Understanding the causes of dark spots can help determine the best treatment option. Common causes include: Sun Exposure: Prolonged exposure to the sun’s UV rays can cause melanin overproduction, leading to dark spots. Post-Inflammatory Hyperpigmentation (PIH): This occurs after an acne breakout or skin irritation, where the affected area darkens. Friction or Rubbing: Tight clothing or accessories can cause friction, leading to hyperpigmentation in areas like the neck and back. Hormonal Changes: Conditions like melasma, often triggered by hormonal changes, can cause dark spots on the skin. 2. Professional Treatments for Removing Black Spots If you’re looking for faster and more targeted results, professional treatments can help significantly reduce dark spots on the back and neck. a. Chemical Peels How It Works: Chemical peels use a solution to exfoliate the top layers of the skin, promoting new cell growth and lightening dark spots. Best For: Mild to moderate hyperpigmentation and post-acne marks. Frequency: Multiple sessions may be needed for optimal results. b. Laser Therapy How It Works: Laser treatments target melanin in the skin, breaking up the pigment and stimulating new skin growth. This is a highly effective way to reduce black spots and even out skin tone. Best For: Severe or stubborn dark spots and hyperpigmentation. Results: Visible improvement after a few sessions. c. Microdermabrasion How It Works: This treatment uses a device to gently exfoliate the skin and remove the outer layer, helping to lighten dark spots. Best For: Surface-level pigmentation and improving overall skin texture. Frequency: Typically requires multiple treatments for the best results. d. Topical Prescription Creams How It Works: Dermatologists can prescribe creams containing ingredients like hydroquinone, retinoids, or corticosteroids, which help to lighten dark spots and promote skin cell turnover. Best For: Mild to moderate hyperpigmentation that doesn’t require more invasive treatments. 3. Effective Home Remedies for Black Spots For those seeking natural and budget-friendly solutions, several home remedies can help reduce the appearance of black spots on the back and neck. a. Lemon Juice and Honey Why It Works: Lemon contains natural bleaching properties, while honey moisturizes and soothes the skin. How to Use: Mix equal parts of lemon juice and honey. Apply to the dark spots, leave it on for 10-15 minutes, and rinse with lukewarm water. Use this remedy 2-3 times a week, but be cautious if you have sensitive skin. b. Aloe Vera Why It Works: Aloe vera contains aloin, a compound that helps to lighten hyperpigmentation and soothe irritated skin. How to Use: Apply fresh aloe vera gel to the affected areas and leave it on for 20-30 minutes before rinsing. You can repeat this daily. c. Turmeric and Milk Why It Works: Turmeric has anti-inflammatory and skin-lightening properties, while milk contains lactic acid that gently exfoliates the skin. How to Use: Mix a tablespoon of turmeric powder with enough milk to create a paste. Apply to the dark spots, leave it on for 15-20 minutes, and rinse. Use 2-3 times a week for best results. d. Apple Cider Vinegar Why It Works: Apple cider vinegar contains acetic acid, which can help to lighten dark spots and even out skin tone. How to Use: Dilute apple cider vinegar with water (1:1 ratio) and apply it to the affected areas using a cotton ball. Leave it on for a few minutes before rinsing. Use this remedy 1-2 times a day, but patch-test first as it can be harsh on sensitive skin. e. Papaya Mask Why It Works: Papaya contains enzymes like papain that exfoliate the skin and promote cell turnover, helping to reduce dark spots. How to Use: Mash ripe papaya into a smooth paste and apply it to the back and neck. Leave it on for 20-30 minutes and rinse with lukewarm water. Use this mask 2-3 times per week. 4. Over-the-Counter Products If home remedies aren’t giving you the desired results, over-the-counter skincare products containing specific ingredients can help fade black spots. a. Vitamin C Serum How It Works: Vitamin C is a powerful antioxidant that brightens the skin and reduces pigmentation by inhibiting melanin production. How to Use: Apply a vitamin C serum to the dark spots daily before applying sunscreen. b. Niacinamide How It Works: Niacinamide (Vitamin B3) helps to lighten hyperpigmentation, reduce inflammation, and improve skin texture. How to Use: Incorporate niacinamide into your skincare routine as a serum or cream to reduce dark spots over time. c. Glycolic Acid or Salicylic Acid How It Works: These exfoliating acids help remove dead skin cells, unclog pores, and lighten dark spots caused by acne or other factors. How to Use: Use products like cleansers or toners that contain glycolic or salicylic acid to target hyperpigmentation. 5. Prevention Tips to Avoid Future Dark Spots While treating existing dark spots, it’s also essential to prevent future ones from forming. Here are some tips to keep in mind: Use Sunscreen: UV rays can worsen hyperpigmentation, so always apply a broad-spectrum sunscreen with at least SPF 30 to your neck and back, especially if you’re using chemical peels or exfoliating treatments. Avoid Picking at Acne: Picking or popping pimples can lead to post-inflammatory hyperpigmentation, which causes dark spots. Wear Loose Clothing: Tight or abrasive clothing can cause friction and lead to dark patches, especially around the neck and shoulders. Exfoliate Regularly: Regular exfoliation helps remove dead skin cells and prevent clogged pores, which can contribute to black spots. Conclusion Black spots on the back and neck can be effectively treated with a combination of professional treatments, home remedies, and over-the-counter

skin

Chemical Peels for Acne: How They Work, Types, Benefits & Side Effects

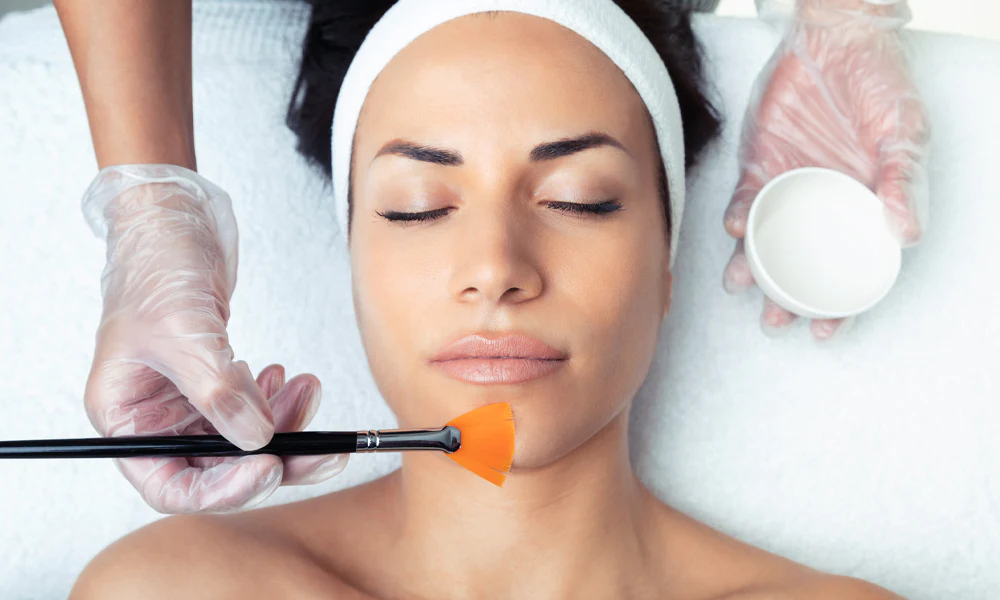
Acne can be a persistent skin concern that affects people of all ages. While topical treatments and medications can help, many people seek faster, more effective solutions to treat acne and its lingering effects, such as scarring. Chemical peels have become a popular option for treating acne and improving overall skin health. Here’s an in-depth look at how chemical peels work, their types, benefits, and potential side effects. How Chemical Peels Work for Acne Chemical peels involve applying a solution containing exfoliating acids to the skin, which causes the top layers of dead skin cells to peel off. This process helps to: Unclog Pores: The exfoliation removes dirt, oil, and dead skin cells that contribute to acne breakouts. Reduce Acne-Causing Bacteria: Some peels contain ingredients that help eliminate the bacteria responsible for acne. Stimulate New Skin Growth: By removing damaged skin layers, peels encourage the growth of new, healthy skin cells, reducing acne scars and improving texture. Control Oil Production: Chemical peels can regulate excessive sebum (oil) production, which is often a cause of acne. Types of Chemical Peels for Acne There are three main types of chemical peels, each suited for different levels of acne and skin concerns: 1. Superficial or Light Peels How They Work: These peels use mild acids like alpha-hydroxy acids (AHAs) and beta-hydroxy acids (BHAs) to exfoliate the outermost layer of the skin. Best For: Mild acne and clogged pores Dull or rough skin texture Occasional breakouts and maintenance Common Acids Used: Glycolic Acid (AHA): Known for its ability to exfoliate and brighten the skin, glycolic acid helps to reduce acne scars and improve skin tone. Salicylic Acid (BHA): Especially effective for treating oily, acne-prone skin, salicylic acid penetrates deep into pores to remove excess oil and dirt. 2. Medium Peels How They Work: Medium peels typically contain trichloroacetic acid (TCA) or stronger AHAs. These peels penetrate deeper into the skin layers to treat more severe acne and acne scars. Best For: Moderate to severe acne Superficial acne scars and hyperpigmentation Those with uneven skin tone Common Acids Used: TCA: Trichloroacetic acid peels are effective at treating acne scars and more stubborn breakouts by removing damaged layers of skin. 3. Deep Peels How They Work: Deep peels use stronger acids, such as phenol, to target deeper layers of the skin. These peels are more aggressive and often require longer recovery times. Best For: Deep acne scars Severe hyperpigmentation and sun damage Only for those with significant skin concerns Common Acids Used: Phenol: This is the most powerful type of chemical peel and is typically used for deep resurfacing. It’s only recommended for severe acne scars and may not be suitable for all skin types. Benefits of Chemical Peels for Acne Clearer Skin: Chemical peels help to unclog pores and reduce acne breakouts, resulting in smoother, clearer skin. Reduced Acne Scarring: Peels promote collagen production, which can help diminish the appearance of acne scars over time. Improved Skin Texture: Regular peeling smooths rough skin and improves its overall texture and tone. Even Skin Tone: Chemical peels can help reduce hyperpigmentation and dark spots caused by acne, giving your skin a more even tone. Fast Results: Compared to some topical treatments, chemical peels can show noticeable improvements in skin texture and acne scars after just a few sessions. Oil Control: By removing excess oil and dead skin cells, peels help reduce oily skin, which is a common cause of acne breakouts. Side Effects of Chemical Peels While chemical peels are generally safe, there are some side effects to be aware of, particularly depending on the strength of the peel: Redness and Irritation: Peels can cause redness and sensitivity, especially immediately after treatment. This usually subsides within a few days. Peeling and Flaking: As the skin begins to shed its outer layers, you may experience visible peeling and flaking. This is a normal part of the process and typically lasts 3-7 days. Sun Sensitivity: Chemical peels make your skin more sensitive to the sun, so it’s crucial to use a high SPF sunscreen and avoid direct sun exposure after treatment. Hyperpigmentation: In rare cases, some people may experience dark spots or patches, especially if they have darker skin tones. To avoid this, it’s essential to consult a professional to ensure the right peel is chosen for your skin type. Infection or Scarring: Though rare, improper care after a chemical peel can lead to infection or scarring. It’s important to follow aftercare instructions carefully. How to Prepare for a Chemical Peel Consult a Dermatologist: A professional consultation is essential to determine the best type of peel for your skin type and acne severity. Pre-Treatment Care: You may be advised to use certain topical treatments, such as retinoids or moisturizers, to prepare your skin. It’s also recommended to avoid any exfoliating products or direct sun exposure in the days leading up to your treatment. Post-Treatment Care: After a peel, follow the dermatologist’s instructions on how to care for your skin. This often includes applying gentle moisturizers, avoiding sun exposure, and using sunscreen regularly. Conclusion Chemical peels can be an effective treatment for acne, acne scars, and other skin imperfections when performed by a professional. By removing damaged layers of skin and stimulating new cell growth, chemical peels help achieve clearer, smoother, and more even-toned skin. However, it’s essential to choose the right type of peel based on your skin type and condition, and to follow proper pre- and post-care instructions to minimize the risk of side effects. At La Fameux Derma Clinic, we specialize in personalized chemical peel treatments tailored to your unique skin concerns. Book a consultation with our dermatologists today to explore how chemical peels can help you achieve clearer, healthier skin!